1. 서론
이번 포스팅은 데모 프로젝트 진행에 있어 필수적으로 구현해야하는 코드는 없습니다. 따라서 Skip해도 괜찮습니다. 이번 시간에는 상태를 저장하는 State-Stored Aggregate에 대해서 알아보겠습니다.
2. Aggregate 종류
AxonFramework 에서 Aggregate의 종류는 크게 두 가지로 분류할 수 있습니다.
- EventSourced Aggregate
- State-Stored Aggregate
EventSourced Aggregate는 기존 Command 어플리케이션을 제작하는 과정에서 구현한 모델 방식입니다. 즉 EventStore로부터 Event를 재생하면서 모델의 최신상태를 만듭니다.

이와 반대로 State-Stored Aggregate는 위 그림과 같이 EventStore에 Event를 적재와 별개로 모델 자체에 최신 상태를 DB에 저장합니다. 데모 프로젝트 Aggregate 구조 변경을 통해 Command DB에 모델을 생성하는 방법에 대해서 알아봅시다.
3. State-Stored Aggregate
데모 프로젝트에는 Holder와 Account Entitiy가 존재합니다. Command 모델에서는 해당 Entitiy 관계를 분리하여 표현할 것이며 모델 구현은 JPA를 사용하겠습니다. 먼저 Command와 Query DB에 적재될 테이블 구조를 살펴보겠습니다.
ERD


3. Aggregate 구현
State-Stored Aggregate 구현을 위해 기존 코드를 단계적으로 변경하겠습니다.
1. HolderAggregate와 AccountAggregate 구조 변경을 통해 상태를 저장할 수 있도록 구현합니다.
HolderAggregate.java
@AllArgsConstructor
@NoArgsConstructor
@Aggregate
@Slf4j
@Entity(name = "holder")
@Table(name = "holder")
public class HolderAggregate {
    @AggregateIdentifier
    @Id
    @Column(name = "holder_id")
    @Getter
    private String holderID;
    @Column(name = "holder_name")
    private String holderName;
    private String tel;
    private String address;

    @OneToMany(mappedBy = "holder", orphanRemoval = true)
    private List<AccountAggregate> accounts = new ArrayList<>();

    public void registerAccount(AccountAggregate account){
        if(!this.accounts.contains(account))
            this.accounts.add(account);
    }
    public void unRegisterAccount(AccountAggregate account){
        this.accounts.remove(account);
    }

    @CommandHandler
    public HolderAggregate(HolderCreationCommand command) {
        log.debug("handling {}", command);

        this.holderID = command.getHolderID();
        this.holderName = command.getHolderName();
        this.tel = command.getTel();
        this.address = command.getAddress();

        apply(new HolderCreationEvent(command.getHolderID(), command.getHolderName(), command.getTel(), command.getAddress()));
    }
}
@Entity 어노테이션을 통해 대상 Aggregate가 JPA에서 관리되는 Entity임을 명시했습니다. 또한 Aggregate 식별자에 @Id 어노테이션을 추가하여 대상 속성이 PK임을 표시합니다.
HolderAggregate는 AccountAggregate와 1:N 관계를 맺고 있으므로 양방향 관계 설정 했으며, HolderAggregate가 삭제될 경우 AccountAggregate도 삭제되도록 orphanRemovel 옵션을 추가했습니다.
마지막으로 양방향 관계 설정 시 연관관계 편의 메소드 제공을 위해 registerAccount, unRegisterAccount 메소드를 추가했습니다.
(참고 : 양방향 연관관계 편의 메소드)
혹시 위 Aggregate 코드에서 JPA 코드 추가 외에 혹시 이상한 점을 눈치채셨나요?
바로 EventSourcingHandler 메소드가 사라졌습니다. State-Stored Aggregate 모델은 모델 자체가 최신 상태를 유지하고 있으므로 EventStore로부터 Replay를 할 필요가 없습니다. 따라서 CommandHandler 메소드 내에서 Command 상태를 저장하는 로직을 포함시켜야 합니다.
이번에는 AccountAggreagte 클래스를 변경하겠습니다.
AccountAggregate.java
@NoArgsConstructor
@AllArgsConstructor
@Slf4j
@Aggregate
@EqualsAndHashCode
@Entity(name = "account")
@Table(name = "account")
public class AccountAggregate {
@AggregateIdentifier
@Id
@Column(name = "account_id")
private String accountID;
@ManyToOne
@JoinColumn(name = "holder_id", foreignKey = @ForeignKey(name = "FK_HOLDER"))
private HolderAggregate holder;
private Long balance;
public void registerHolder(HolderAggregate holder){
if(this.holder != null)
this.holder.unRegisterAccount(this);
this.holder = holder;
this.holder.registerAccount(this);
}
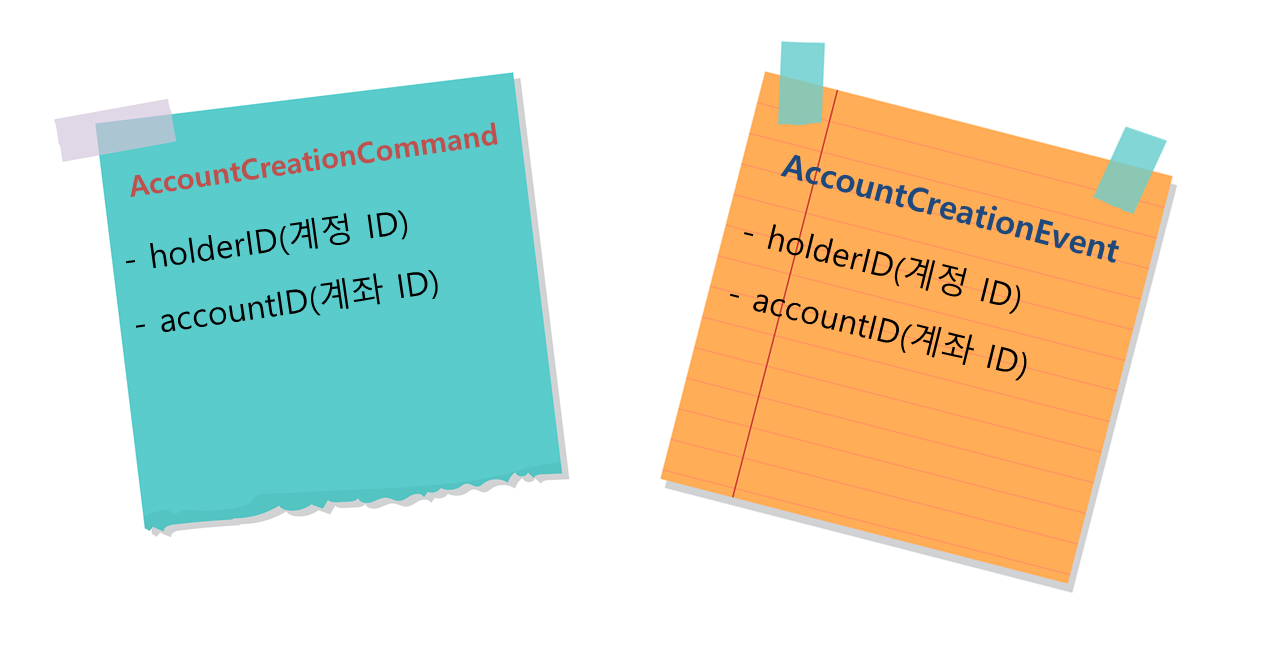
@CommandHandler
public AccountAggregate(AccountCreationCommand command) {
log.debug("handling {}", command);
this.accountID = command.getAccountID();
HolderAggregate holder = command.getHolder();
registerHolder(holder);
this.balance = 0L;
apply(new AccountCreationEvent(holder.getHolderID(),command.getAccountID()));
}
@CommandHandler
protected void depositMoney(DepositMoneyCommand command){
log.debug("handling {}", command);
if(command.getAmount() <= 0) throw new IllegalStateException("amount >= 0");
this.balance += command.getAmount();
log.debug("balance {}", this.balance);
apply(new DepositMoneyEvent(command.getHolderID(), command.getAccountID(), command.getAmount()));
}
@CommandHandler
protected void withdrawMoney(WithdrawMoneyCommand command){
log.debug("handling {}", command);
if(this.balance - command.getAmount() < 0) throw new IllegalStateException("잔고가 부족합니다.");
else if(command.getAmount() <= 0 ) throw new IllegalStateException("amount >= 0");
this.balance -= command.getAmount();
log.debug("balance {}", this.balance);
apply(new WithdrawMoneyEvent(command.getHolderID(), command.getAccountID(), command.getAmount()));
}
}
HolderAggregate에서 설명한 부분은 제외하고 추가된 점은 Account 모델이 Holder 모델에 대하여 FK를 지니고 있으므로 관계상에서 FK를 명시하였습니다.
2. HolderAggregate 클래스 생성을 위한 Repository 패키지 및 클래스를 생성합니다.

3. HolderRepository 클래스를 구현합니다.
@Repository
public interface HolderRepository extends JpaRepository<HolderAggregate,String> {
    Optional<HolderAggregate> findHolderAggregateByHolderID(String id);
}
4. 객체 대상으로 연관관계를 변경하였기 때문에 AccountCreateCommand 클래스를 수정합니다.

5. Service 클래스를 수정합니다.
@Service
@RequiredArgsConstructor
public class TransactionServiceImpl implements TransactionService {
    private final CommandGateway commandGateway;
    private final HolderRepository holders;

...(중략)...

    @Override
    public CompletableFuture<String> createAccount(AccountDTO accountDTO) {
        HolderAggregate holder = holders.findHolderAggregateByHolderID(accountDTO.getHolderID())
                                       .orElseThrow( () -> new IllegalAccessError("계정 ID가 올바르지 않습니다."));
        return commandGateway.send(new AccountCreationCommand(UUID.randomUUID().toString(),holder));
    }

...(중략)...
}
6. Snapshot 설정을 위해 생성한 Configuration 속성을 적용하지 않도록 AxonConfig 클래스 @Configuration 어노테이션을 주석처리 합니다.
//@Configuration
//@AutoConfigureAfter(AxonAutoConfiguration.class)
public class AxonConfig {
...(중략)...
}
이로써 State-Stored Aggregate 구현에 대한 코드 변경은 끝났습니다.
4. 테스트
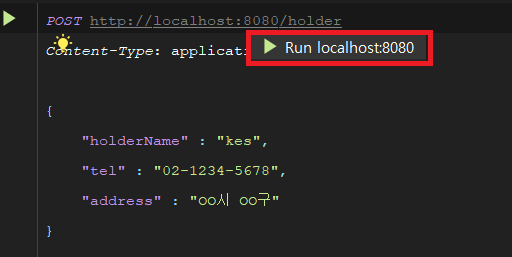
1. Application 실행 후 계정 생성 API 테스트를 진행합니다.
POST http://localhost:8080/holder
Content-Type: application/json

{
	"holderName" : "kevin",
	"tel" : "02-1234-5678",
	"address" : "OO시 OO구"
}
2. DB에서 계정 데이터 생성 여부를 확인합니다.

3. 계좌 생성 API를 호출합니다.
POST http://localhost:8080/account
Content-Type: application/json

{
  "holderID" : "486832c2-b606-470d-949a-9f9d8613b112"
}
4. DB에서 계좌 데이터 생성 여부를 확인합니다.

5. 입금 API를 호출합니다.
POST http://localhost:8080/deposit
Content-Type: application/json

{
  "accountID" : "9274bb43-ca87-4aa4-b1b4-0363382ad6fb",
  "holderID" : "486832c2-b606-470d-949a-9f9d8613b112",
  "amount" : 300
}
6. DB에서 해당 계정 잔고를 확인합니다.

정상적으로 입금된 것을 확인할 수 있습니다.
7. 출금 API를 4번 연속으로 호출합니다.
POST http://localhost:8080/withdrawal
Content-Type: application/json

{
  "accountID" : "9274bb43-ca87-4aa4-b1b4-0363382ad6fb",
  "holderID" : "486832c2-b606-470d-949a-9f9d8613b112",
  "amount" : 1
}
8. DB에서 출금 내역을 확인합니다.

정상적으로 출금된 것을 확인할 수 있습니다.
o.a.commandhandling.SimpleCommandBus     : Handling command [com.cqrs.command.commands.WithdrawMoneyCommand]
c.c.command.aggregate.AccountAggregate   : handling WithdrawMoneyCommand(accountID=9274bb43-ca87-4aa4-b1b4-0363382ad6fb, holderID=486832c2-b606-470d-949a-9f9d8613b112, amount=1)
c.c.command.aggregate.AccountAggregate   : balance 296
org.axonframework.messaging.Scope        : Clearing out ThreadLocal current Scope, as no Scopes are present
4번 연속 출금 후 Application의 로그를 일부 발췌하였습니다. 기존과 다른점은 EventSourced Aggregate의 경우에는 Replay를 위해 EventStore의 I/O 과정이 필요했지만 State-Stored Aggregate는 상태를 보관하므로 상태 복원 과정이 없습니다.
5. 마치며
State-Stored Aggreagte는 Command DB에 최신 상태를 보관합니다. 이로인해 매번 EventStore를 통해서 Replay를 하지 않아도 되는 점은 장점입니다.
하지만 만약에 테이블 데이터가 손실이 되어서 복구가 필요한 경우 Replay를 자동으로 수행되지 않으므로 별도로 EventSourcing 하는 작업을 구현해야 할 수 있습니다. 물론 DBMS 자체 복구 기능을 이용할 수도 있습니다. 하지만 Media Recovery가 불가피하다면 DB 서비스 중단이 발생합니다. 따라서 Aggregate별 사용 장단점을 인지한 다음 적절한 사용이 필요합니다.
이상으로 Command Application 구현 포스팅 마치도록 하겠습니다.
'MSA > AxonFramework' 카테고리의 다른 글
| 11. Query 어플리케이션 구현(Event) - 1 (0) | 2020.01.06 |
|---|---|
| 10. EventStore (0) | 2020.01.02 |
| 8. Command 어플리케이션 구현 - 3 (0) | 2019.12.29 |
| 7. Command 어플리케이션 구현 - 2 (2) | 2019.12.28 |
| 6. Command 어플리케이션 구현 - 1 (1) | 2019.12.27 |